In this guide I will be walking you through installing the N-Able N-sight agent via Intune to a Windows 11 Autopilot device.
N‑able N‑sight™ RMM (Remote Monitoring and Management) is a cloud-based platform designed for managed service providers (MSPs) and IT professionals. It helps them remotely monitor, manage, and secure client networks, devices, and servers. The platform includes features like automated patch management, antivirus, backup, performance monitoring, and alerting. It also allows for remote access and provides tools for troubleshooting and maintaining systems efficiently, enhancing IT service delivery and reducing downtime.
Creating the Intune WIN file
Start by logging into the N-Sight dashboard which can be found at: https://dashboard.systemmonitor.co.uk
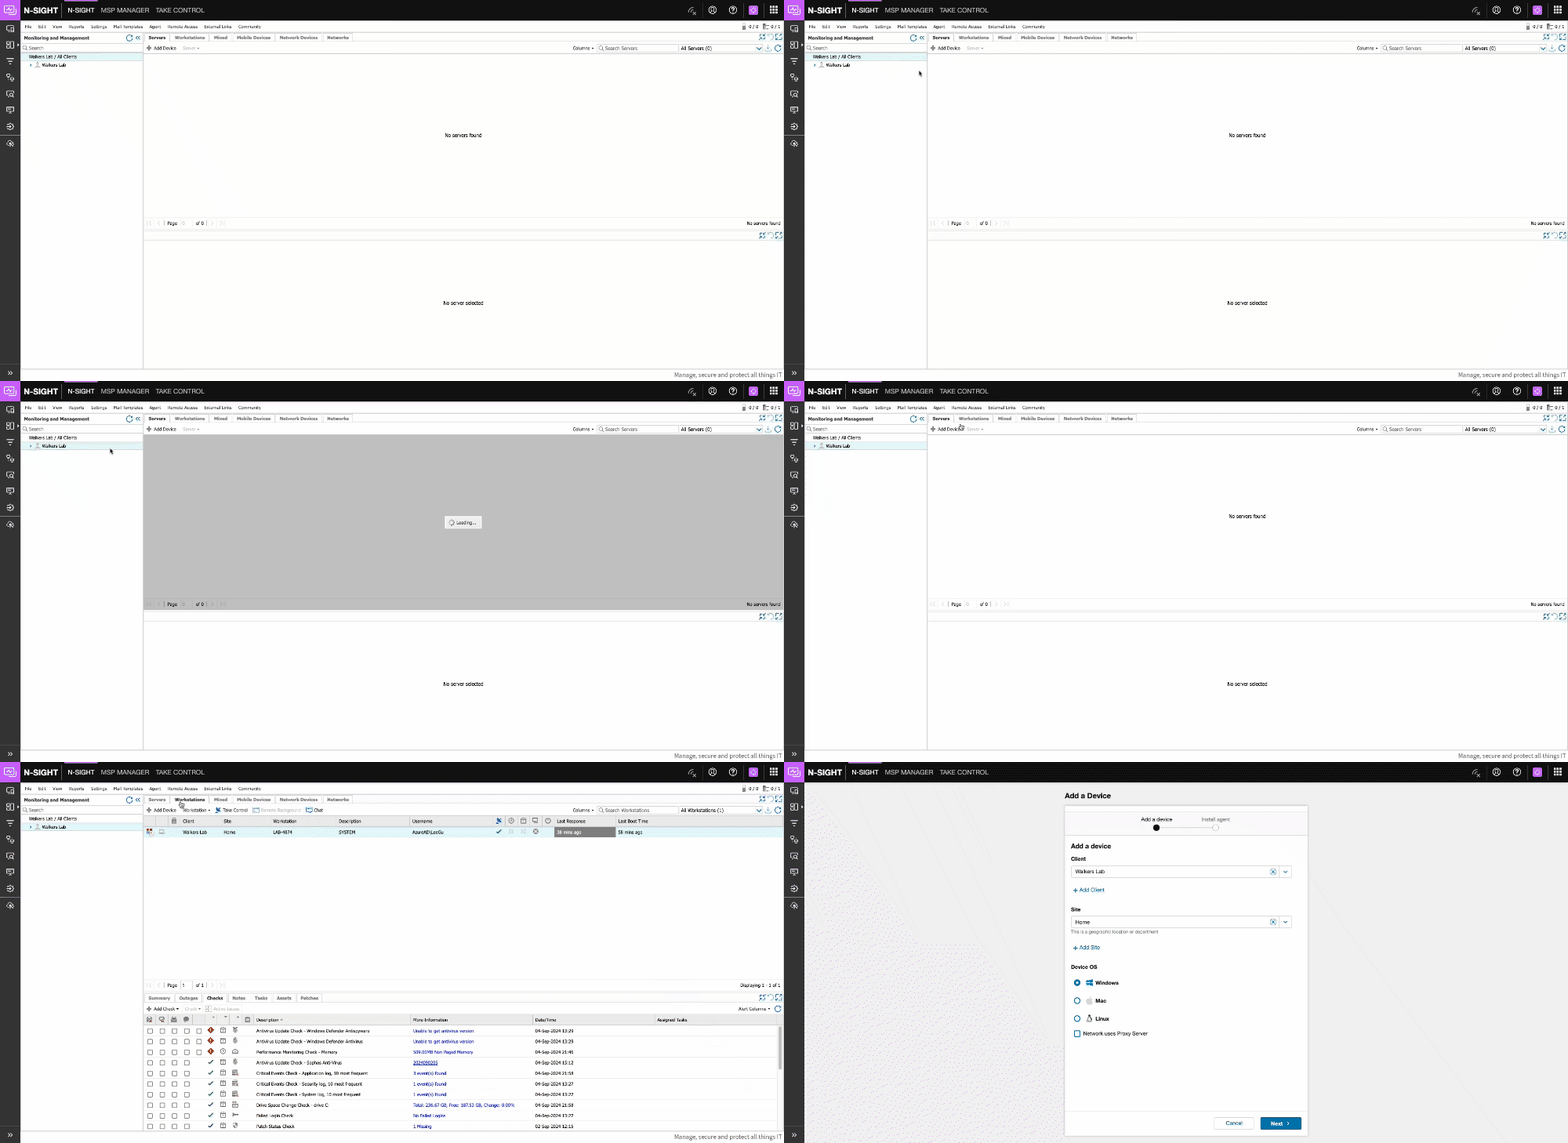
Once logged into your dashboard, select the client you want to add devices to. Click on the “Workstations” tab then click “Add Device”.

Within the “Add a Device” page, select the client you want to add the devices to from the drop down menu. Then select the clients site, then choose “Windows” as the OS and finally click “Next”.

It will then start to automatically download the agent installer file. If it fails to automatically download the installed, click on “Retry download”.
Once downloaded you’ll have a ZIP file, extract the EXE file from the ZIP and place the EXE file into the source folder for the Intune App Creator tool. In my example it was saved to C:\Users\Admin\Desktop\Intune App Creator\source\N-Able Agent

Now launch the IntuneWinAppUtil.exe application.
This tool can be downloaded from https://github.com/microsoft/Microsoft-Win32-Content-Prep-Tool
When prompted fill in the paths for the required files/folders. In my example it was:
| Source folder | C:\users\admin\desktop\intune app creator\source\n-able agent |
| Setup file | C:\users\admin\desktop\intune app creator\source\n-able agent\AGENT_369298_V10_13_8_RW.EXE |
| Output folder | C:\users\admin\desktop\intune app creator\output\n-able agent |
| Catalog folder | N |

Deploying the app via Intune
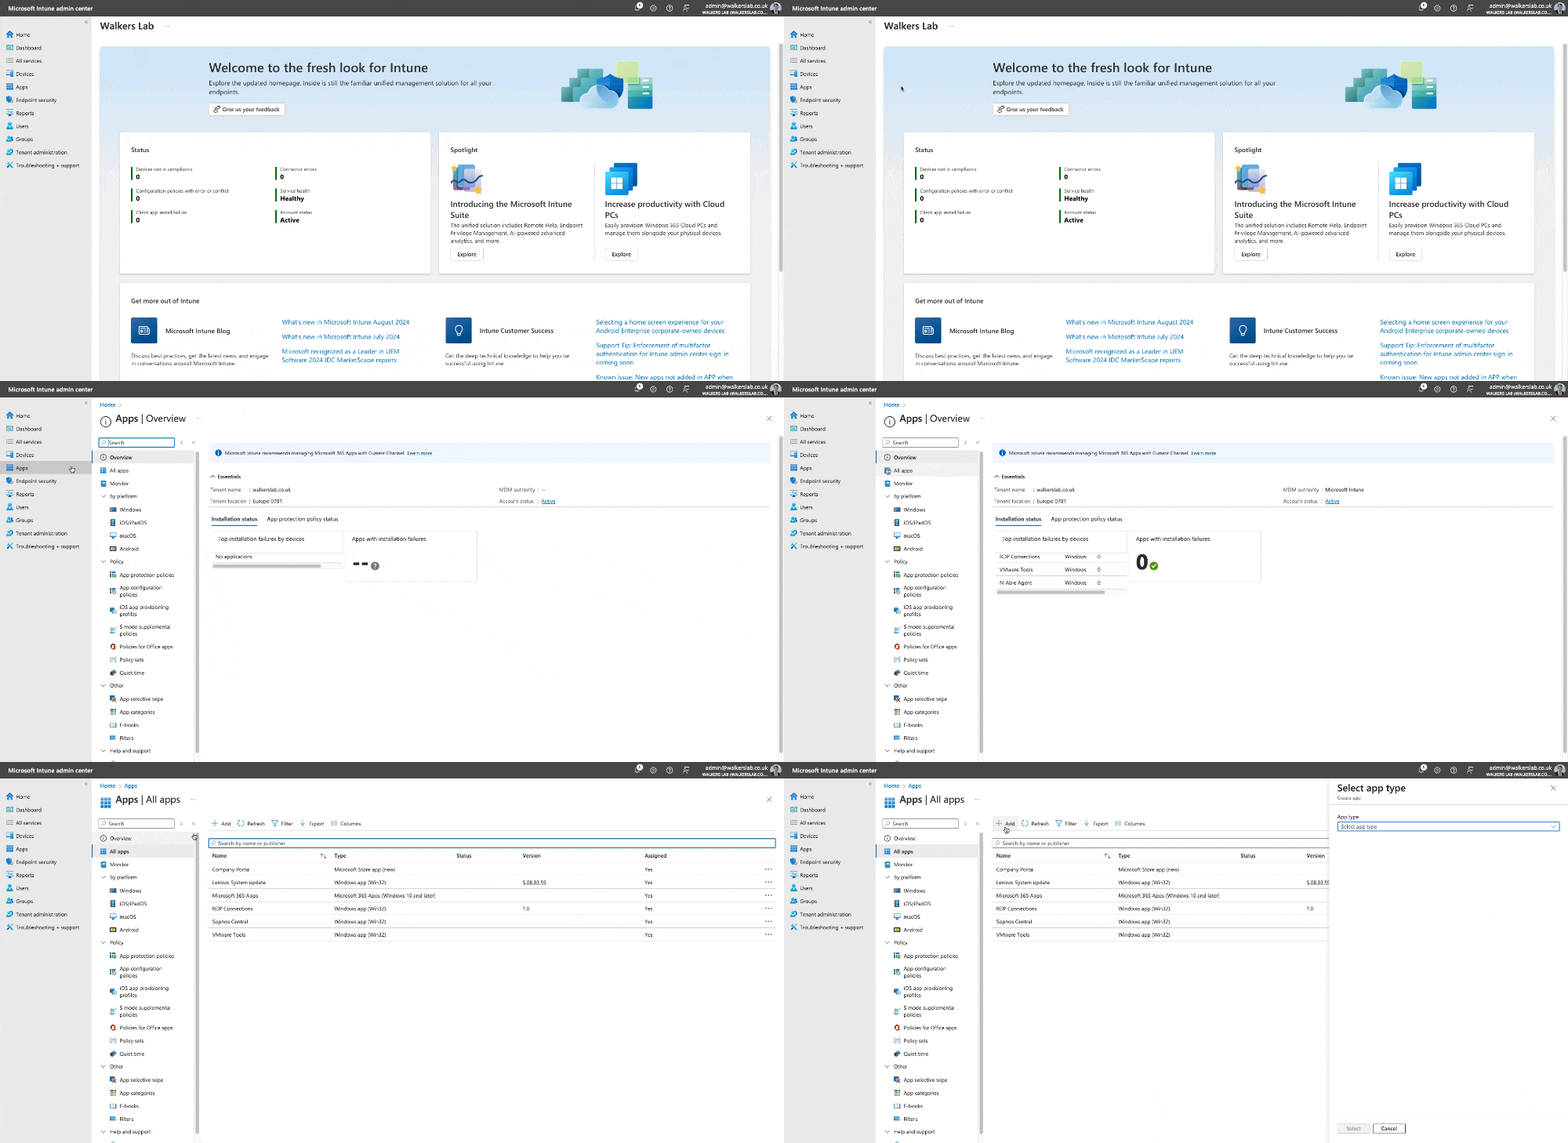
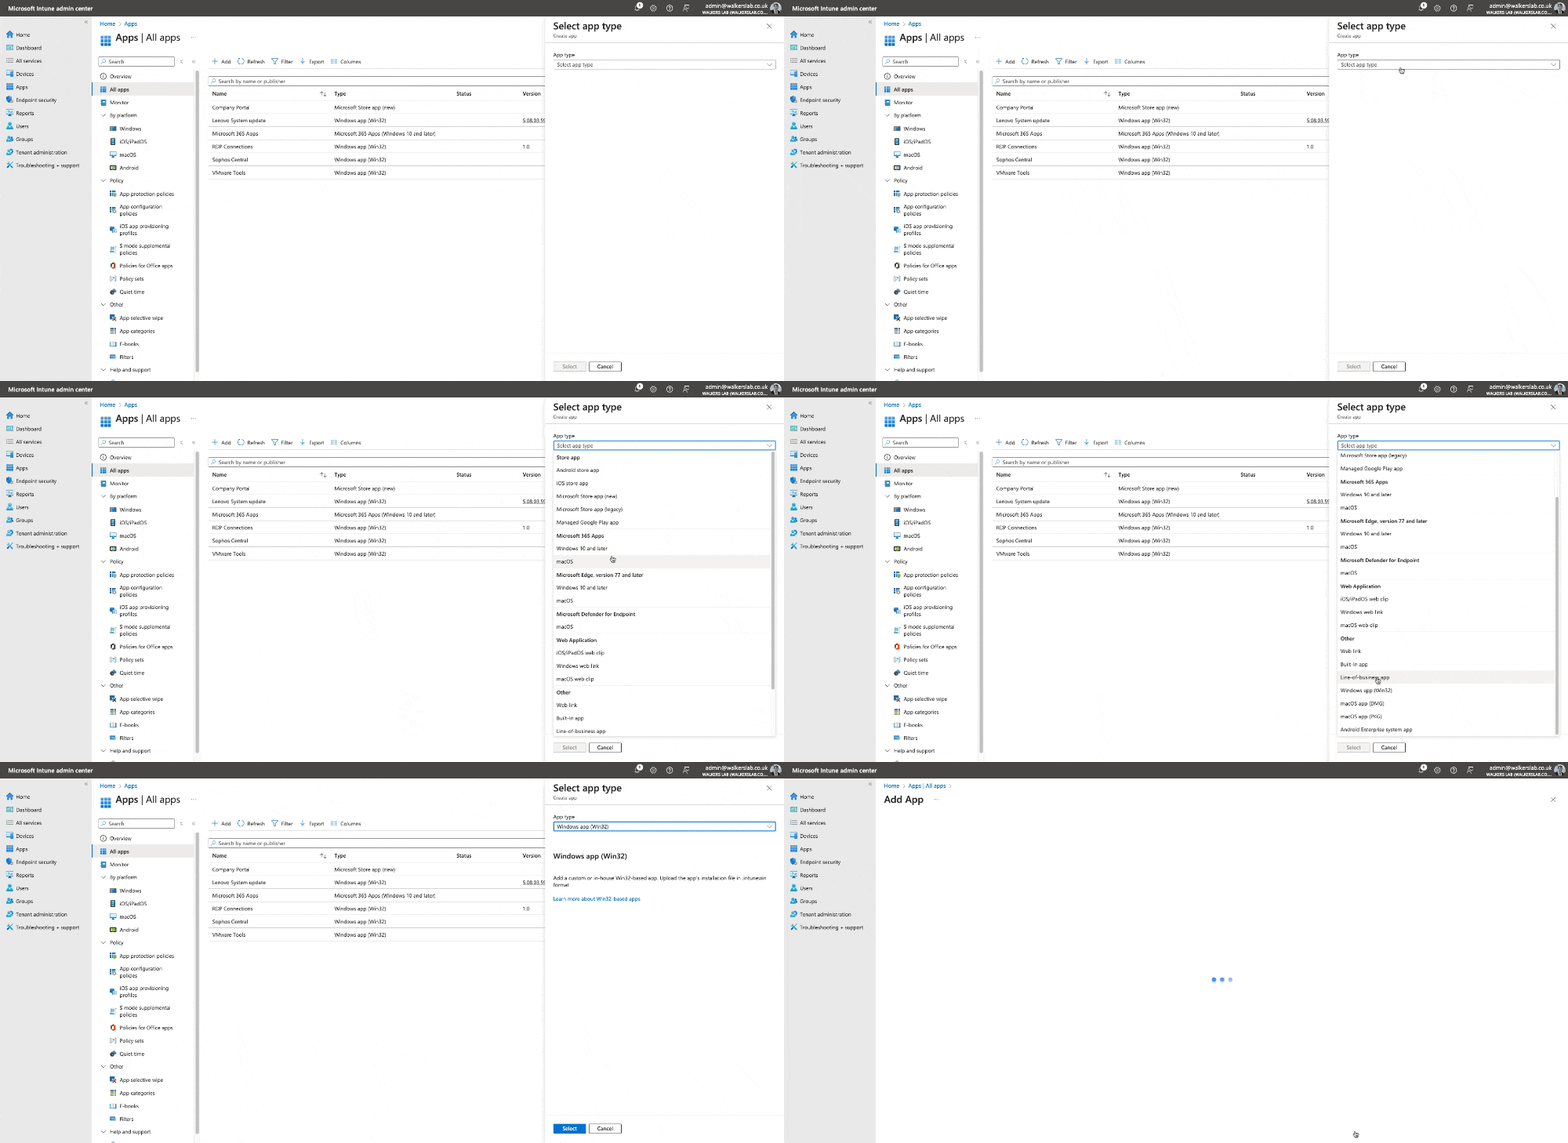
Navigate to your Microsoft Intune Admin Centre, click on “Apps” then “All Apps” then “Add”.

In the “App type” dropdown menu, choose “Windows App (Win32)” then click “Select”.

Click on “Select app package file”, then click on the browse icon and choose your intunewin file which we created earlier. Once selected click on “OK” then “Next”.

Now you’ll need to fill out the required fields with the information for the app.
Example of information:
| Name | N-Able Agent |
| Description | Manage endpoints, users and devices across all your physical, hybrid and cloud environments. |
| Publisher | N-Able |
| App version | 10.13.8 |
| Information URL | https://www.n-able.com/products/n-sight-rmm |
| Privacy URL | https://www.n-able.com/legal/privacy |
Once you have filled out the required fields, click “Next”.

The next step is to specify the Install and Uninstall commands which Intune will use to install the application. Enter the following commands and leave the rest of the settings as default:
| Install command | AGENT_369298_V10_13_8_RW.EXE /S |
| Uninstall command | C:\Program Files (x86)\Advanced Monitoring Agent\unins000.exe /SILENT |
NOTE: The install command is the setup EXE file which was downloaded earlier. The file name may be different.

Select the required operating system architecture and minimum operating system. Then click on “Next”.

For the detection rule choose “Manually configure detection rules” from the dropdown menu.
In the Detection rule menu fill out the following fields:
| Rule type | File |
| Path | C:\Program Files (x86)\Advanced Monitoring Agent |
| File or folder | winagent.exe |
| Detection method | File or folder exists |
| Associated with a 32-bit app on 64-bit clients | No |
After filling out the required fields, click “OK” then “Next”.

Click “Next” on the Dependencies section.

Click “Next” on the Supersedence section.

Within the Assignments section you can chose how the application is made available to devices. In my example I will be making the N-Able agent required for all devices.
Once you have chosen your assignment, click on “Next”.

Finally click on “Create”.

Verifying the deployment
You can verify the application has been deployed to a device by viewing an enrolled device which the application has been assigned to. Then navigating to the “Managed Apps” section. Here you should see the application and the installation status.

Alternatively you can also verify the application has been installed by logging into your N-Able Dashboard, selecting your client, clicking on Workstations and looking for the Hostname of a device which has the application assigned to it.

